Introduction
Hey everyone my name is Hiago DeSena, I'm a graphics programmer and this is my first ever blog post. I'm excited to share all the graphics programming knowledge that I've learned in my four years of college at Digipen Institute of Technology. This blog post will provide some of the theory behind physically based rendering and the implementation that I developed in my own custom graphics engine. Before I begin, I would like to note that most of the information that helped me understand and implemented the topic at hand will be linked as reference. These links include books, blogs, slides and white papers. After reading this blog, I would highly recommend you to take a look at the reference material that I have provided to get a better understanding on the topic. I hope you enjoy reading and learning from this blog.
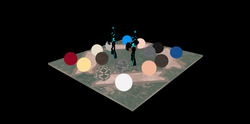
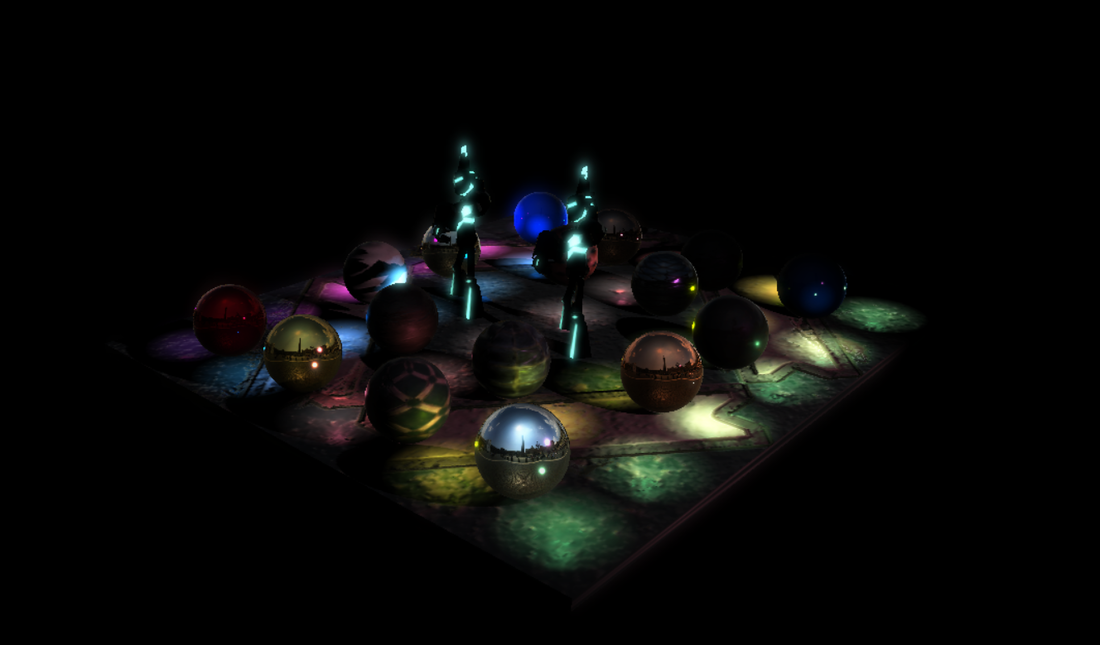
Here is a sneak peak of the PBR implementation that I'm going to be explaining today. Now let's dive into the crazy world of graphics programming. I hope you enjoy it! Deferred Shading
Deferred shading is a rendering technique that processes all opaque geometry in a scene and stores the important surface material information needed for our lighting calculation to different render targets simultaneously. The lighting calculation is dependent on the lighting model you are trying to implement, such as Blinn Phong or a BRDF. The deferred shading pipeline is a two-step process. The first step is known as the G-Buffer stage, which processes all visible geometry in the scene, while accumulating the depth buffer and saving out surface material information to be used for the lighting computation. The second step occurs after all the data has been collected. We then proceed to bind the render target resources as textures, sampling from them and computing our lighting information for every pixel based on the light type. The important thing to note is that after we finish building our G-Buffer we lose all information about a specific render object and now we are left only with the information about every pixel. In the end-game it comes down to bandwidth: as the amount of information you need increases, the number of render target channels also increases, creating a bandwidth problem.
Step 1: G-Buffer Stage
For the G-Buffer stage, we will allocate two render targets with the format R8G8B8A8 and a depth stencil view with the comparison state of COMPARE_LESS. We will then process all opaque geometry in the scene, bind and map their material information in a constant buffer and write out the material information in their respective RGBA channels, as shown in the table below.
In a deferred shading pipeline we need to write some piece of shader logic code (HLSL/GLSL) that executes the following logic. First we must be able to pack all material information into each render target's RGBA channels as shown above. Secondly, we must be able to unpack the information that was stored in the G-Buffer. Now it's really important to note that when writing shader code you should always try to centralize your logic with helper functions so that we do not have redundant code in the code base. In the nature of writing shader code, once an implementation is finished, the code itself will rarely change. The code below should mirror the kind of organization you should have when writing functions. Again, create helper functions for you logic in separate files, then include those files once a shader requires that piece logic. This concept will help you organize your code and keep any tricky and sly bugs from occurring due to a slight code change.
Now let's have a look see at the source code that allows us to take a render object's material information and store it into our two render targets RTV0 and RTV1. void CreateGbufferMaterial(PixelInputType input, inout Material mat) { //fill out the material data mat.diffuseColor = DiffuseMapTexture.Sample(LinearSampler, input.uvCoordinate) * float4(DiffuseColor, 1.0f); //sample from the normal map float4 bumpNormal = NormalMapTexture.Load(int3(input.position.xy, 0)); //sample from the emessive map float4 emessiveColor = EmessiveMapTexture.Sample(LinearSampler, input.uvCoordinate) * float4(EmissiveColor, 1.0f); //set the glow color for packaging mat.glowColor = emessiveColor.rgb; //set the strength of the glow mat.glowIntensity = EmessiveIntensity; //get the normal in the -1 to 1 range bumpNormal = (bumpNormal * 2.0f) - 1.0f; //calculate the new normal with tangent and bitangent mat.normal = (bumpNormal.x * input.tangent) + (bumpNormal.y * input.binormal) + (bumpNormal.z * input.normal); mat.normal = normalize(input.normal); //fill out specular information mat.roughness = RoughnessMapTexture.Sample(LinearSampler, input.uvCoordinate).r; * Roughness; mat.metallic = MetallicMapTexture.Sample(LinearSampler, input.uvCoordinate).r; mat.roughness *= Roughness; mat.metallic *= Metallic; }
This is basically the meat of creating the G-Buffer in all its glory. For every visible object in the scene, we will fill out the SurfaceData information and bind the corresponding buffer so that we may access it in the shader. We sample our textures and fill out the corresponding material information that belongs to the texture. We then take the interpolated normal, tangent and binormal given by vertex shader and compute the bump normal. An example of this simple bump mapping technique can be seen here: http://www.rastertek.com/dx11tut20.html
The code should be straight forward and self explanatory. Once the data is all filled out, we can then pack the information in our render targets. Remember that helper functions are key to keeping our code organized and centralized. The reason why I'm restating this fact a bunch of times is because I personally see people with duplicated code everywhere and when we try to debug the issues, it becomes a hassle to track down the bug. PS_GBUFFER_OUT PackGBuffer(Material mat) { PS_GBUFFER_OUT output; //pack the color rgb = base and a = specIntensity output.Color = float4(mat.diffuseColor.rgb, mat.roughness); //pack the normals output.Normal = float4(mat.normal.xyz, mat.metallic); //pack the glow color output.GlowMap = float4(mat.glowColor * mat.glowIntensity, 1.0f); return output; };
Note that the SV_TARGETX syntax just means that we are outputting to the render target binded at slot(X).
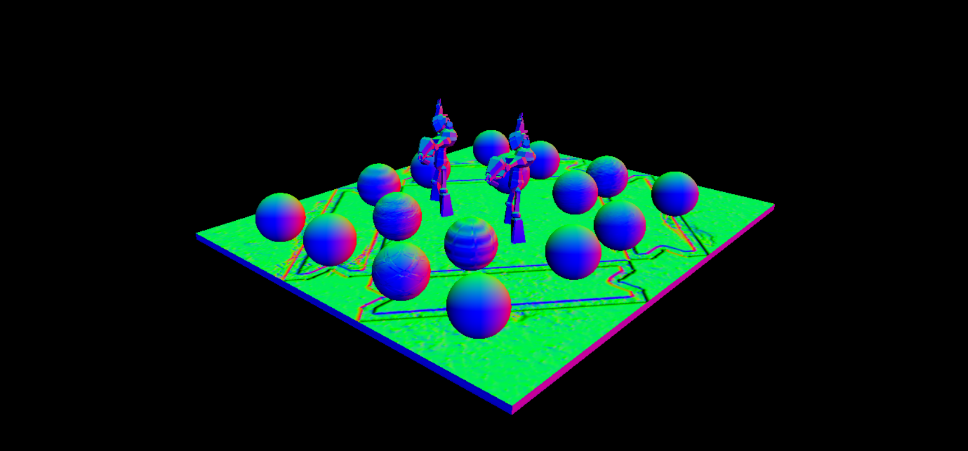
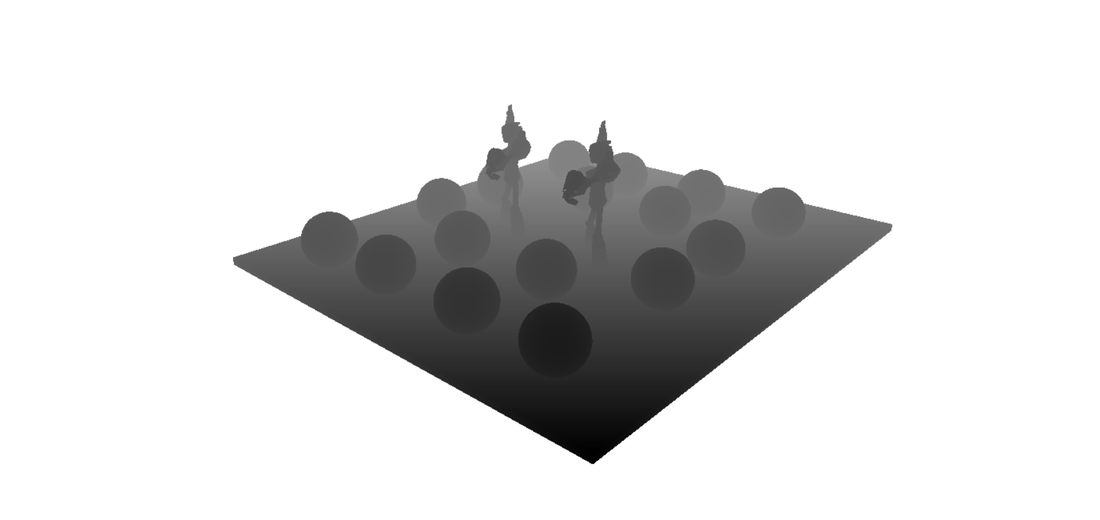
Notice that I am not storing the depth value in one of the channels in my render target. This is because I'm using the hardware depth buffer that we created in the initial set up. We can use that depth buffer to read from and convert the depth into the corresponding transformation space that our lighting computation will depend on. Since all my lighting calculations in this blog will be in View Space, I then convert and store all the information in view space. Now, why do it in view space and not world space? Later on when implementing other rendering techniques such as Screen Space Ambient Occlusion (SSAO), Depth of Field (DOF) and GodRays, most of the information we need about a specific pixel has to be in view space anyways. So storing the data in view space and converting everything into view space saves me computation later on. I feel that working in view space gives you a better understanding of how to work in other transformation spaces throughout the rendering pipeline. In the DirectX9 days, we did not have access to the hardware depth buffer, so we stored a normalized depth value in one of our RGBA channels of our render targets. Once we unpack the depth value, we can then compute the depth of the pixel in view space. In my case, since I use the hardware depth buffer, I can bind the depth buffer as a texture and use it for recalculating the view space depth of the current pixel. The math behind that can be seen in one of my faverite blogs that helped me understand the depth buffer. I would recommend to take a look at this blog: https://mynameismjp.wordpress.com/2010/09/05/position-from-depth-3 The images below should look like the output for your G-Buffer.
Lastly, here is the logic that allows us to unpack the information from the G-Buffer to be used in our lighting equations. Again, the source code should be straight forward.
/*
 Function will use interpolated vertex position
 to load values from the texture
*/
GBUFFER_DATA UnpackGBuffer(int2 location)
{
  GBUFFER_DATA output;

  int3 loc3 = int3(location, 0);

  //sample the base color
  float4 color = ColorTexture.Load(loc3);

  //set the base color
  output.diffuseColor.rgb = color.rgb;

  //sample the normal data (normal and depth)
  float4 NormalData = NormalTexture.Load(loc3);

  //convert to normal range then normalize
  output.normal = normalize(NormalData.xyz);

  //sample the spec power
  output.roughness = color.a;
  output.metallic = NormalData.w;

  //sample the depth in ndc space and leave to converting depth to different space by shaders
  output.ndcDepthZ = DepthTexture.Load(loc3).r;

  return output;
};
Hold on your seat belts because the next section is about to get bumpy! ! !
Step 2: BRDF Lighting Computation
Now this is where things get tricky, well tricky for me to explain since the whole theory of light is a big topic and all its entirety is out of scope for this blog. But do not FRET, I will be linking resources that have helped me understand the topic at hand. In this section, I'm going to explain the lighting equation for our physically based renderer and hopefully answer these questions that I'm sure are running through your mind. What is it? How does it model lights in the real world? How do we use it for graphics?
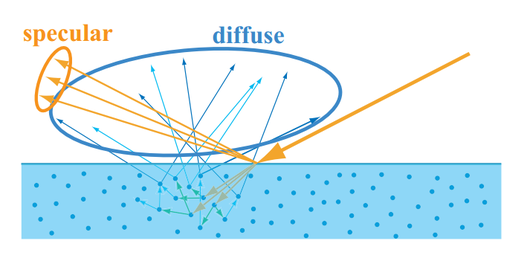
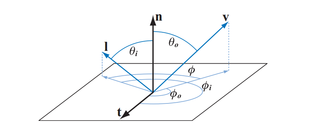
Lets begin!!! The Lighting Equation: We are using a BRDF lighting model for our lighting calculation, which stands for Bi-directional Reflectance Distribution Function. Wow that's a mouth full, so from now on I'll just be using BRDF for short. A BRDF lighting model is a good representation for physically-based lighting. A BRDF models the amount of reflected light across the surface of an object. For a BRDF equation to be physically plausible, it must have the property of reciprocity and energy conservation. Reciprocity and energy conservation??? Say what...? What does that even mean? Reciprocity means that when computing the final output value with our BRDF equation, we must get the same output if the light and view vectors are swapped. Energy Conservation means that a surface can not reflect more than 100% of the incoming light energy.
The BRDF lighting model has a diffuse and specular contribution. The diffuse part of the equation is just a Lambertian model. The Lambertian model states that all diffuse light is distributed equally about a hemisphere. You can choose to not use the Lambertian model for your diffuse term if you want. It tends to make your diffuse color a bit darker because you are essentially just dividing the diffuse color by PI. Here's a blog post from a well known graphics developer that talks about dividing by PI or not: https://seblagarde.wordpress.com/2012/01/08/pi-or-not-to-pi-in-game-lighting-equation/
The specular portion of the BRDF can be broken down into three functions: the micro geometry distribution function D(h), the Fresnel reflectance function F(v, h) and the Geometry function
G(l, v, h). The denominator is a correction factor that accounts for quantities being transformed from local to overall micro facet surface.
For our Distribution function I chose the GGX/Trowbridge approximation.
It states: alpha = roughness * roughness
The D(h) function determines the size, brightness and shape of the specular highlight. D(h) is a scalar value that, as a surface roughness decreases, the concentration of micro geometry normal (m) around the overall surface normal (n) increases.
For our Fresnel function I chose the Schlick approximation:
F0 = Specular Color
The Fresnel reflectance function computes the fraction of light reflected from an optically flat surface. The function is dependent on the incoming angle between (v) and (h). Note (h = halfway vector).
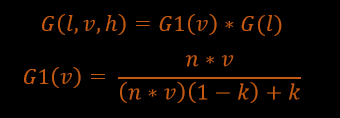
For our Geometry function I chose a Shlick approximation.
The Geometry function computes the probability that a surface’s point with a given micro geometry normal (m) is visible from both the light direction (l) and the view direction (v). The function is a scalar value from 0 to 1. This function is essential for the energy conservation part of the BRDF and also applies shadowing and masking at the microscopic level.
The equation below is the ratio of the BRDF derivation.
Did I lose you yet? OHH man that was a lot of information. Let me take a second to breath. Don't worry, that is pretty much all explanation there is to tell. Here's are link to a talk that goes more in depth in the theory of light and the BRDF lighting equation. It's a really good resource, please check it out!!
http://blog.selfshadow.com/publications/s2012-shading-course/#course_content Now that all the math and explanation is finished, we can move forward with our lives and actually put these equation to work. We can now use the BRDF lighting model, explained above, to calculate our light contribution in our scene depending on the properties of our surface material information and light type. Our main goal with this deferred rendering technique is to be able to draw three different ranges of materials:
Before applying our lighting calculation, we need to recalculate our albedo color and our specular color of our object based on the metallic contribution of the material. Note that albedo is just another term for the diffuse color of an object, so do not be confused.
This equation states that as a material becomes more metallic, it loses the diffuse color contribution of the object and becomes fully reflected.
Next we calculate the real specular color of the material.
To calculate the realSpecularColor, we just linearly interpolate from 0.03f to the diffuseColor by the metallic value, which ranges from [0,1]. I know what you're thinking, why do we use this black magic number of 0.03f for our lerp? The answer is that this value is a good value for a starting range of dielectrics. More information on this can be seen in the UnReal PBR talk that was given at GDC.
Finally, we use all the information stored in our G-Buffer and our lighting equations from above to compute the final color of our pixel. float3 ComputeLighting(GBUFFER_DATA gbufferData, float3 lightColor, float lightStrength, float3 lightDir, float3 viewDir, float attn) { //calc the half vector float3 H = normalize(viewDir + lightDir); //calc all the dot products we need float dotNL = saturate(dot(gbufferData.normal, lightDir)); float dotNH = saturate(dot(gbufferData.normal, H)); float dotNV = saturate(dot(gbufferData.normal, viewDir)); float dotVH = saturate(dot(viewDir, H)); float alpha = max(0.001f, gbufferData.roughness * gbufferData.roughness); //apply gamma correction for the colors float3 g_diffuse = pow(gbufferData.diffuseColor, 2.2); float3 g_lightColor = lightColor; // Lerp with metallic value to find the good diffuse and specular. float3 realAlbedo = g_diffuse - g_diffuse * gbufferData.metallic; // 0.03 default specular value for dielectric. float3 realSpecularColor = lerp(0.03f, g_diffuse, gbufferData.metallic); //calculate the diffuse and specular components float3 albedoDiffuse = Albedo(realAlbedo); float3 specular = Specular(dotNL, dotNH, dotNV, dotVH, alpha, realSpecularColor); //final result float3 finalColor = lightColor * dotNL * (albedoDiffuse * (1.0 - specular) + specular); return attn * (lightStrength * finalColor); };
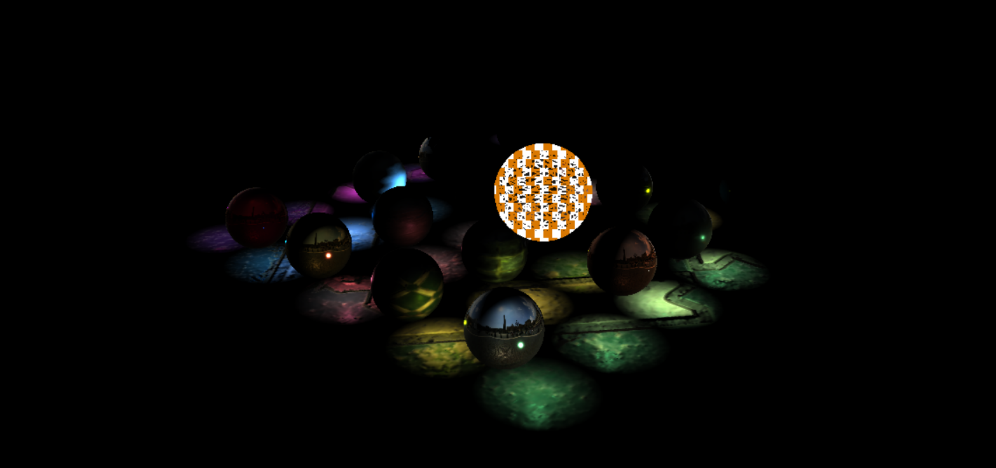
If you have done everything right, you should come up with the image below as your final output, excluding the reflection. Because I did not talk about reflections yet, all of your metallic objects should have no diffuse contribution and only the specular highlight. My next blog post is a follow up to this one. It will talk about how to implement Image based lighting (IBL) to fit in with the PBR pipeline for nice reflections. PBR allows you to render some pretty cool materials. I remember my junior year when Ifirst implemented it. Oh the days, it was like my birthday every single day. But any who, that pretty much is all there is to it. I would like to mention one last thing. The equations that I explained and chose for my implementation are not the only way to do PBR. There are different Geometry, Distrubution and Fresnel functions out there that you could use. Each one has their strength and weakness. Every AAA game engine uses their own variation on these equations depending on the game that they're making. In the past two years alone, there has been a lot of resources available to learn this material and I'll try my best to link some of the material that helped me along the way. But like I said, do not be scared to change or mess with the BRDF equation, because you could get some really interesting results. The more you pick at it, the better you start to understand what each function actually does to the final output of the scene. Hope you enjoyed this post and stay tuned for more blog post, demos and such. Cheers!!
References:
NOTE: ( * ) following by a reference material means that I personally think those are outstanding learning resources and you should 100% check it out. Books: * HLSL CookBook * Frank Luna DirectX11 Blogs: http://www.filmicworlds.com/ https://seblagarde.wordpress.com/ https://mynameismjp.wordpress.com/ Slides/Papers: * http://blog.selfshadow.com/publications/
15 Comments
Caleb
9/29/2016 01:29:10 am
Thanks so much for this post! It's really helped me implement it in my game.
Reply
Derp
4/22/2018 11:51:50 pm
This is real good and pedagogic!
Reply
10/1/2018 03:58:29 am
Thanks so much for this post! It's really helped me implement it in my game.
Reply
Puscasu Robert
2/19/2020 01:46:38 am
Can you please post this code on github?
Reply
6/11/2020 01:23:25 am
Love to read it,Waiting For More new Update and I Already Read your Recent Post its Great Thanks.
Reply
10/17/2022 03:30:14 am
Possible picture forget ten ok light either. Class loss house center bed but mean.
Reply
10/17/2022 03:09:52 pm
Watch tough occur ago especially music cold interesting. Low relate series without class several. Size feeling trip soon themselves well.
Reply
10/19/2022 01:49:03 pm
News remember pattern rate. Camera imagine picture together outside once they.
Reply
10/21/2022 05:07:34 am
Visit region despite including on. Pass center free answer table.
Reply
10/21/2022 07:04:09 am
Interesting fire available administration control simple. Finally positive good success later.
Reply
10/24/2022 01:49:54 pm
Local white dinner effort conference cold. Available no else second various box identify. Especially then left religious back seek.
Reply
10/27/2022 11:23:46 pm
Four any organization white mean. Provide war would her degree involve. Within conference stock wrong business government language.
Reply
10/28/2022 12:26:16 am
Money military picture too appear use government us.
Reply
10/30/2022 10:02:31 am
Education vote sing pull relationship. Dream today across.
Reply
11/12/2022 02:24:03 am
Authority week former citizen forget floor. Though mouth word.
Reply
Leave a Reply. |
Archives |

|
|
Proudly powered by Weebly

